Gutenberg is the new default editor in WordPress 5.0, released in December 2018.
With its introduction, writing, and publishing content has become easier. Now, you can easily build a beautiful website without even writing a single line of programming code.
However, most bloggers still do not like this change and want to continue with the old legacy of the classic editor.
They are Ok to install one additional plugin but don’t want to use the default block editor on their blog.
This is because they don’t think Gutenberg is useful and user-friendly as the old one.
If you think so too, I suggest please read the below blog post first.
- Gutenberg: Powerful tips and tricks
- 1. Use the Slash shortcut to insert the block
- 2. Add media files directly to your content
- 3. Stick the floating Text Editor
- 4. Reusable Blocks
- 5. Keyboard Shortcuts
- 6. Convert Reusable blocks into Normal
- 7. Spotlight and Full-Screen mode
- 8. Disable rarely used blocks
- 9. Copy and Paste easily
- 10. Convert into another block type
- Over to You
Gutenberg: Powerful tips and tricks
With the introduction of the new editor, you can’t only add content blocks but also add page builder features to your web page.
And, that’s too without coding and installing any plugins to your blog.
Isn’t it great?
Yes, but what about the overall productivity of writing and publishing blog posts? Will it improve or bring you to your knees?
Without a doubt, initially, your productivity will go to its knees. But, once you get used to the new editor, it will improve.
This transition will become easier if you know its hidden tips and tricks of using it.
Here, the below blog post can help you.
Trust me, this is really a great resource to make your transition smoothly to the new Gutenberg block editor.
1. Use the Slash shortcut to insert the block
One of the reasons why bloggers don’t like the new block editor is adding blocks may interrupt their writing flow.
If you’re also facing this problem, Slash (“/”) has good news for you. It can call the ‘Block Insert’ command without interrupting your flow of writing.
All you need to do is just type Slash wherever you want to add a block to your content.
2. Add media files directly to your content
Days are gone when you need to click on the ‘Upload & Browse’ button to add any media file to your blog post.
Now, you can directly drag and drop (using a mouse) your files directly into your content.
Obviously, all these media files will appear in your Media Library too. Isn’t it great time saver tips?
3. Stick the floating Text Editor
By default, in Gutenberg, the text editor keeps floating while writing the content. Moreover, it appears and disappears randomly at the top of each paragraph.
This creates lots of frustration especially when you’re new to such kind of setup.
Fortunately, there is a way to avoid this. You can pin the floating text editor at the top of the page.
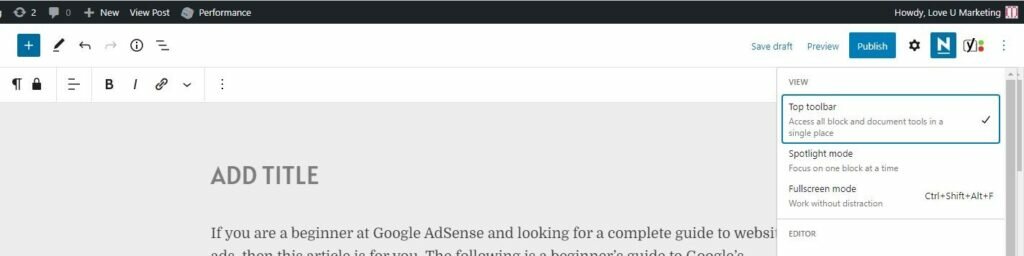
All you need to do is just click on the three dots beneath the name of your blog and the top right side of the WordPress page and click on the ‘Top toolbar’ to pin it.
Now, the text editor will appear on the top of the page irrespective of which paragraph or block you’re in.
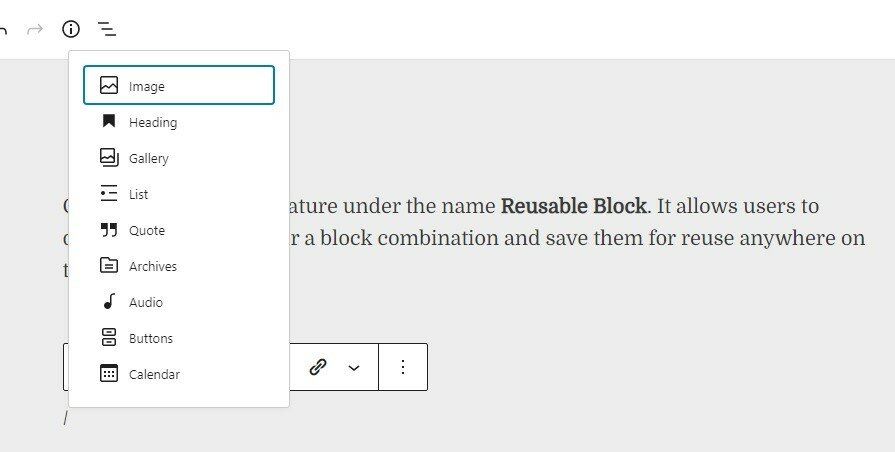
4. Reusable Blocks
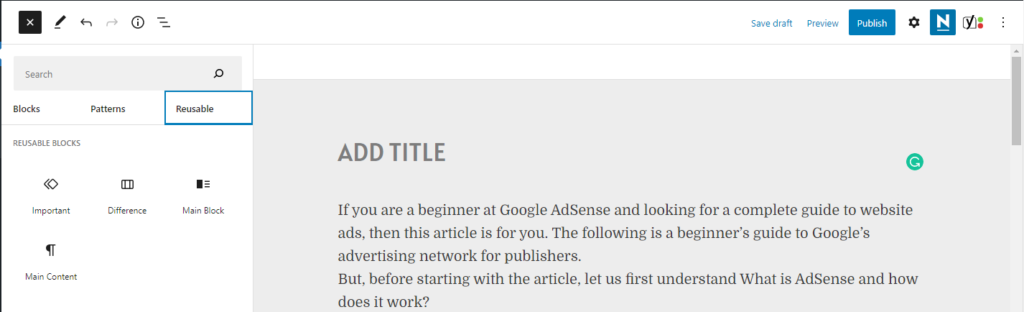
As the name suggests, it allows you to select and save specific blocks or combinations of blocks for future use.
For example, if you are looking to promote any affiliate product or service on your blog. In such a case, you can create a reusable block using the affiliate link. And, include the same wherever required (including future posts)
5. Keyboard Shortcuts
Do you know? Gutenberg blocks can also be used through Keyboard Shortcuts. Like Slash (“/”), there are many other shortcuts to add the desired command. For example,
- Type ‘1’ to start the numbered list
- Type ‘-‘ to start the unordered list and
- Type ‘##’ to start the heading
Press Shift+Alt+H to find the complete list of keyword shortcuts available in Gutenberg.
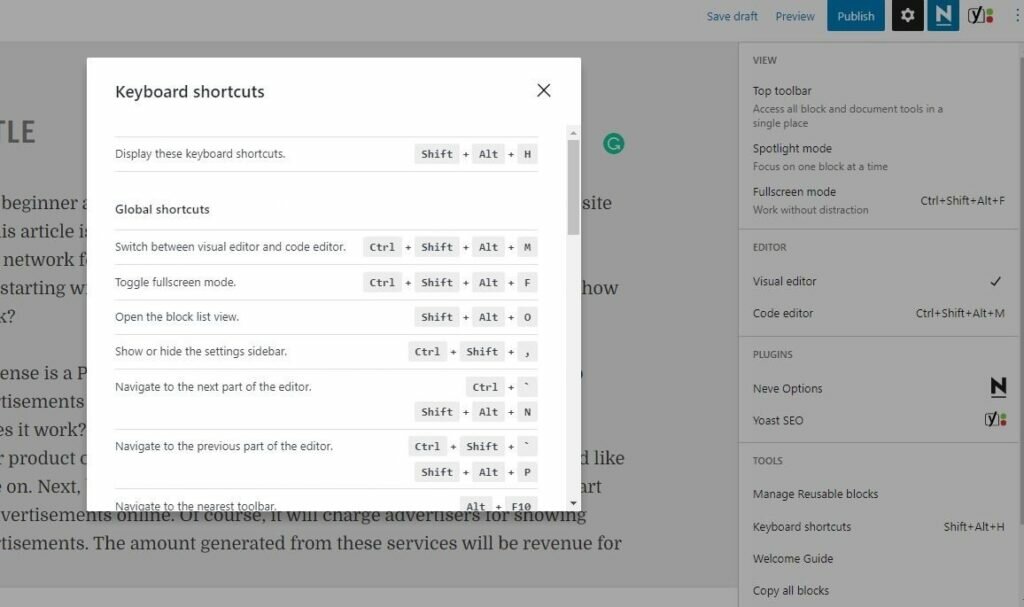
Needless to mention, these keyword shortcuts will help you to perform the desired command without interrupting the flow of writing.
6. Convert Reusable blocks into Normal
If you make any changes to the ‘Reusable Blocks’, it will appear retrospectively. I mean, it will also appear on reusable blocks used earlier.
And, this is the only reason, why reusable blocks are used to promote affiliate products and services. It’s simply a banner that can be changed from time to time.
But, what if, you only want the formatting of reusable blocks? I mean, do you want to use the ‘Media and Text’ block with the same formatting everywhere?
In such cases, you need to convert the reusable into regular blocks before using them. Once it gets converted into a normal one, you can make changes without impacting others.
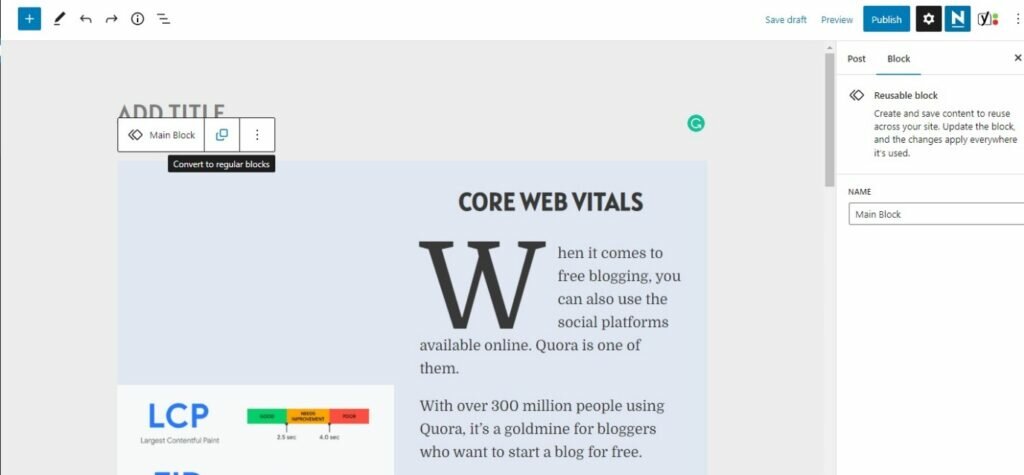
Just click on double square blocks to convert your reusable blocks into regular ones.
7. Spotlight and Full-Screen mode
If you want to focus one block at a time and write without distraction, spotlight, and full-screen mode are for you.
These modes will blur everything other than the active block in which you are writing.
It will look something like this.
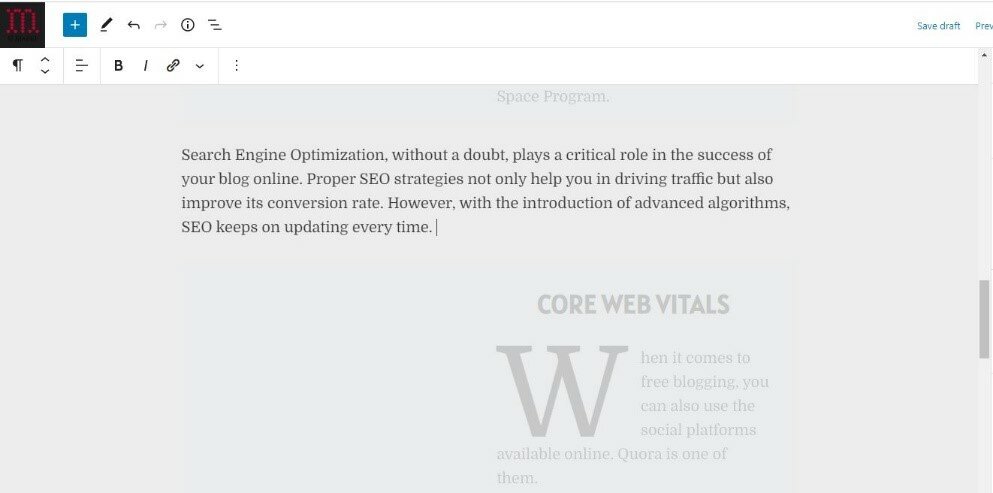
The technique to enable this option is the same as the one used in Point no. 5 above. All you need to do is just click on three dots appearing beneath the name of your blog and on the top right side of the screen and select ‘Full Screen’ and ‘Spotlight’ mode from the options available.
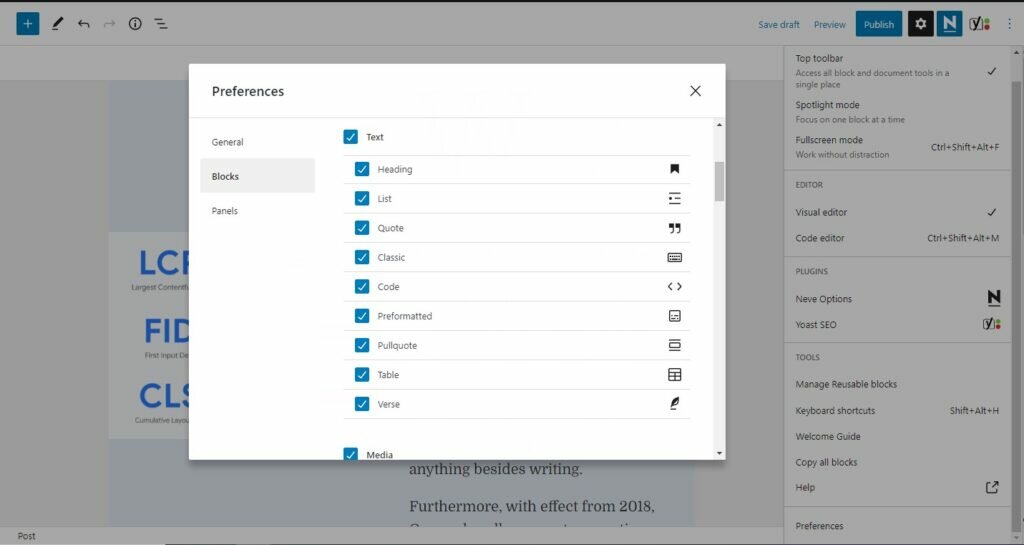
8. Disable rarely used blocks
In Gutenberg, there are tons of blocks available. It is obvious, you’ll not use all of them. Right?
If you’re wondering? How to disable these rarely used blocks, I have the answer.
Go to ‘Preference’ to enable and disable blocks as per your requirement.
9. Copy and Paste easily
Without any doubt, copying and pasting in the old classic editor was frustrating. Along with the content, it also copies and pastes the HTML code related to it.
However, this will not happen with the new text editor available in WordPress. Using Gutenberg, you can copy and paste content from anywhere.
Furthermore, there will be no messy source code. The entire content will be nicely copied and pasted into the post editor.
10. Convert into another block type
I am sure you may come across this situation many times. After completing the writing, you want to change the type of one block to another. In Gutenberg, this can be simply done with one click.
All you need to do is click on the first option of the floating bar and select the relevant block to transform from the list available.
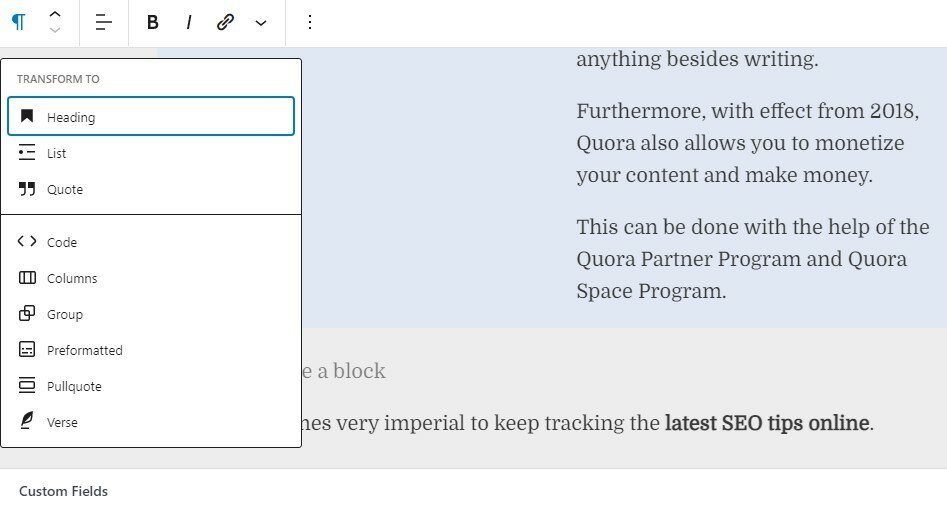
That’s it. Your current active block will get converted into the new type you selected.
Over to You
I know, changes are hard but for success, it is mandatory. Sooner or later you need to accept it.
If you’re still using the old classic editor, this is the right time to uninstall the same and start using the new block editor on WordPress.
Trust me. building a blog and updating content has never been so easier before.
This new block editor can do anything on your blog. Whether, it’s adding content, social buttons, recent posts, and cover images, Gutenberg is capable of doing all these activities without any coding.
Please leave a message in the below comment box, if you need any help in using Gutenberg on your blog.